Imagine the day. Travel has opened back up and you’re dusting off that passport. Dormant airline miles are being used. You’re now loving your company’s newly minted remote work policy. You can’t wait to work from exotic locations around the world.
You’ve also mastered a great Zoom setup at home. But can you reproduce it in a hotel?
The answer is yes.
But it takes a bit of education & planning.
Here are 5 steps for great video meetings while traveling:
Step 1: Choose a ‘video optimized’ location
It goes without saying – but most rooms are setup for activities to occur within the room. Not for people on the other end of a video conference. So determining where to setup your temporary remote office is the first major decision you have to make.
The good news is that hotel rooms often have desks in them. But having your unmade bed in the video behind you isn’t professional. And if you’re like me – a couple of screaming kids in the background doesn’t help either.
I recommend asking your hotel if they have a Board room. Many hotels will often let you use it for free if it’s not in use.
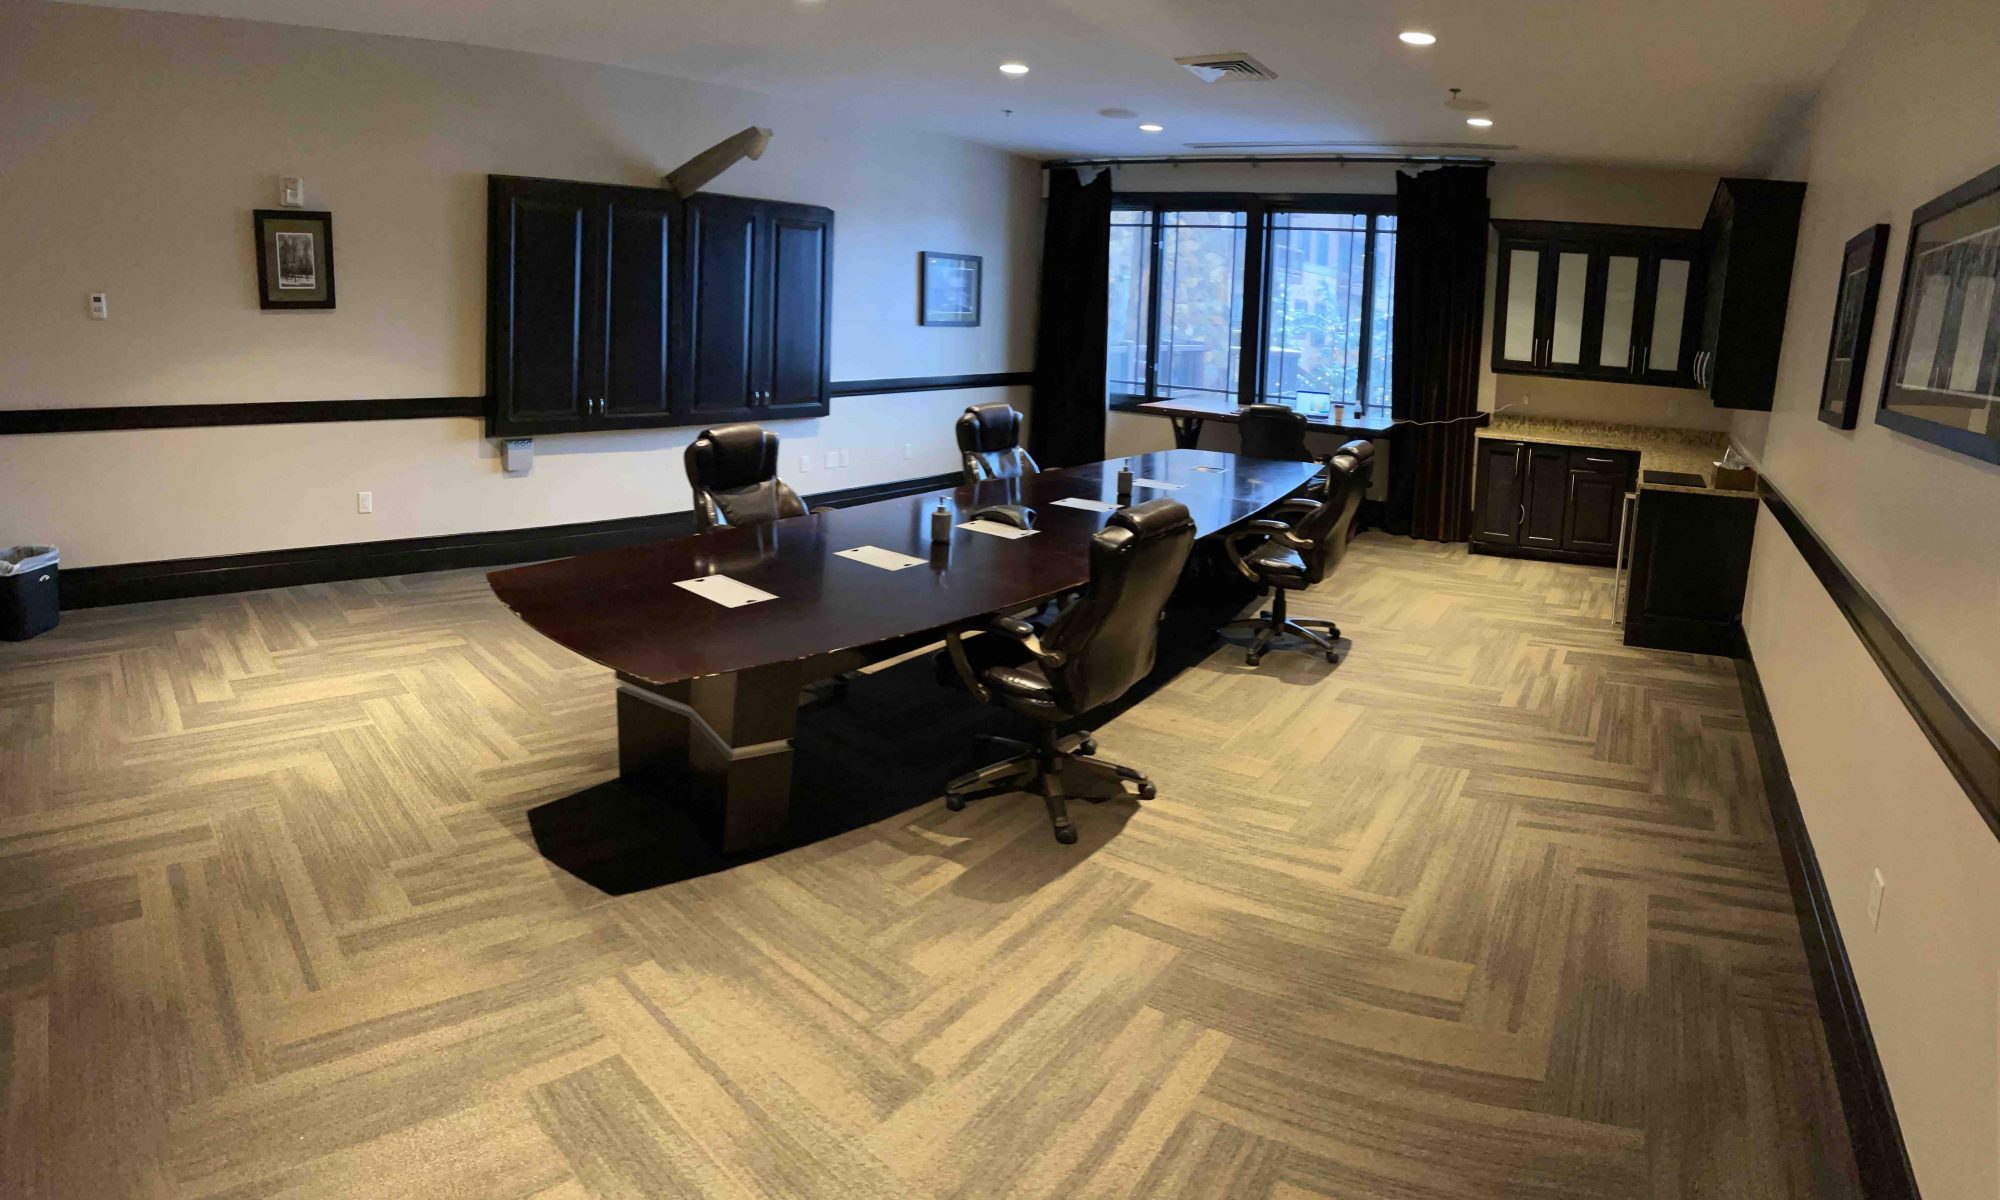
Below is a Board room at a hotel I stayed at during spring break. The room is nice – but picking the right location within the room is key.
The natural inclination is to pick a chair in the middle of the table, place your laptop down and be on your way. But that would be a poor choice and not leverage the assets of the room.

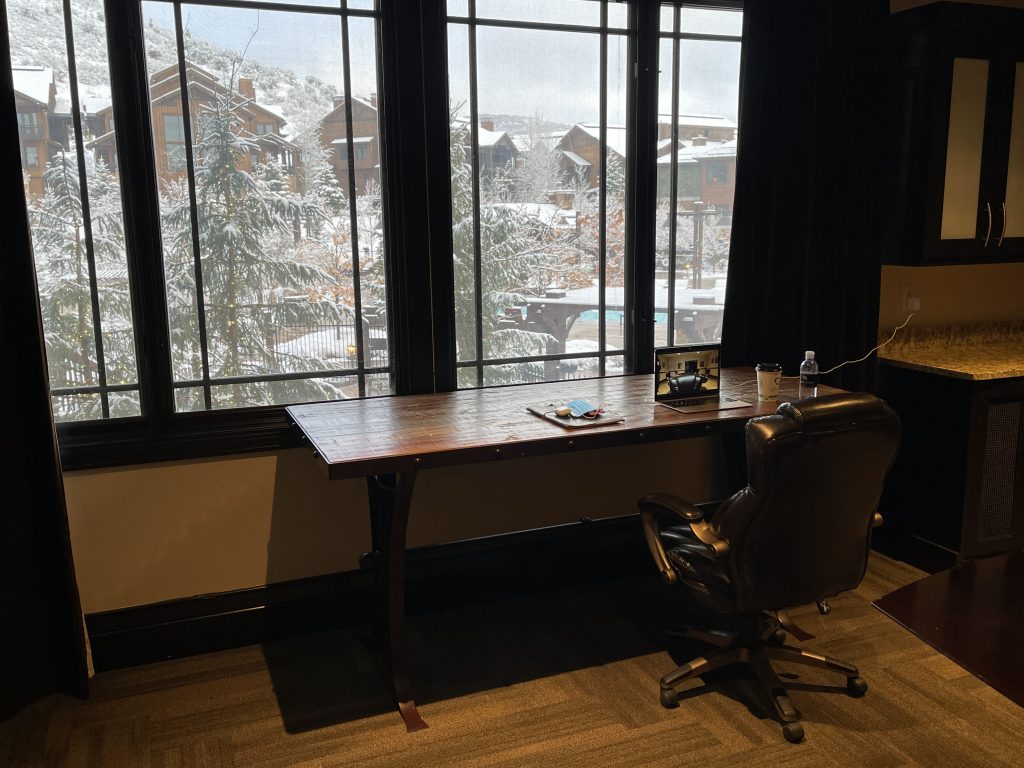
Another common mistake is to want the ‘pretty scene outside’ as the background and sit with the window behind you. As you can see from the picture below – the light coming from the window is too bright and your face will be dark/not visible in the camera.

Though counterintuitive – the best decision for this room is to pull the buffet table in front of the window and use that as your workspace. The natural light then shines on your face – and you get a great view during your meetings.
Step 2: Arrange the right camera orientation
Nothing makes your video image look worse than the wrong camera angle.
Look at the picture below. On the left – you have a professional video setup (newscaster) and on the right, you have a guest with an amateur video conferencing setup.

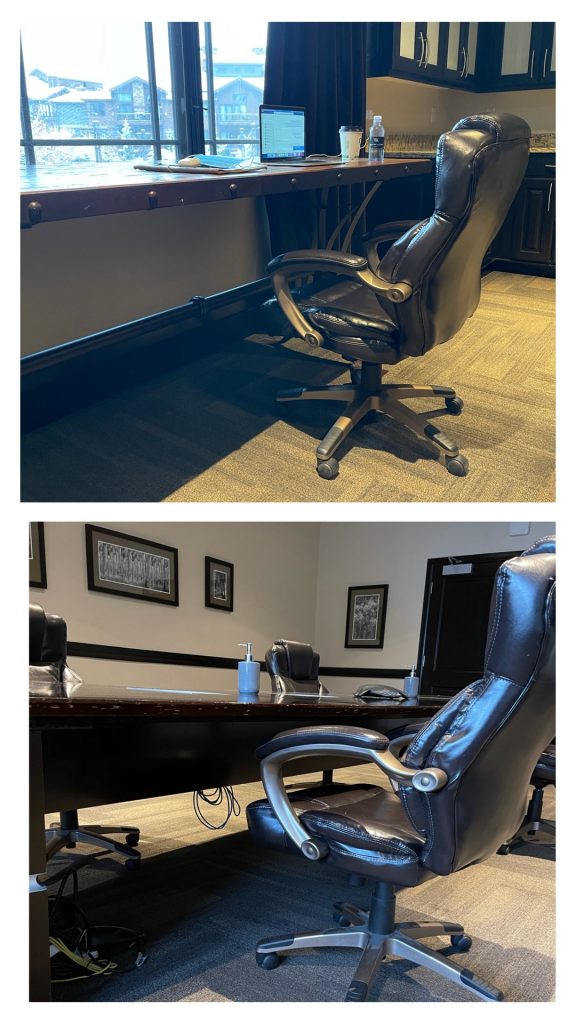
Though you’re unlikely to find a newsroom setup while you travel – you can easily recreate something close. The key is to ensure the camera on your laptop is at eye level and you sit far enough back to get most of your torso in the image. Here is a blog that dives into details about setting up the right camera orientation (How a stack of books can make your video conferencing 10x better).
To get your camera at eye level, you’ll often need to put the laptop on a stack of books or something else to raise it. For my hotel Board room above – I got lucky in that the buffet table was 7 inches taller than the Board room table. This brought the camera to near eye level (and a small adjustment of the chair height did the rest).
Step 3: Add depth to the background
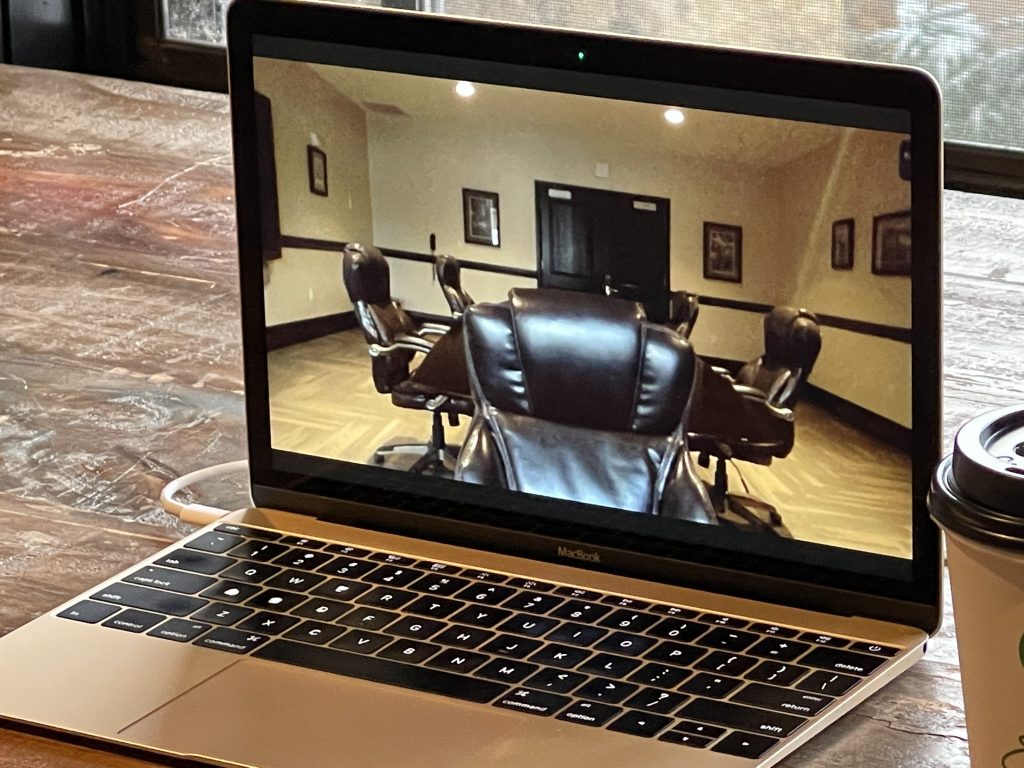
Many people use virtual backgrounds nowadays (most poorly – but that’s a topic for another day). If you look closely at those images – you’ll notice that they make you appear as if you’re sitting in a large room. This adds ‘depth’ to the background to make it more interesting.
In the hotel room above – I moved the chair so that I was sitting parallel to the long side of the board room table. This made the table directly behind me and created the balanced ‘depth’ in my background.
See the picture below for what it looks like on video (and my head covered the ugly door). Ironically – folks on my Zoom calls thought it was a fake background. Success.
Step 4: Use a noise-cancelling microphone
Unlike doing video meetings at home – it’s hard to predict what random noises will come from the hotel hallway. And playing the mute/unmute game never works well.
So instead – use a noise-cancelling software like Krisp. There are a few software providers out there and they all work great to eliminate unwanted background noise while isolating your voice. I’ve even taken video meetings from noisy hotel lobbies – and participants in the video meeting couldn’t tell the difference.
Another benefit of using Krisp is that it removes the ‘large room’ echo. For big hotel rooms like the one above – this comes in handy.

Step 5: Bring a USB microphone
People often use AirPods or other bluetooth headsets with laptops. But the microphone audio quality of most of them are terrible (sorry Apple). For truly ‘podcast’ audio quality during meetings – I recommend a USB directional microphone for your laptop.
I use the Movo 1000 since it’s slim and fits into my laptop bag easily. It’s also USB powered so it doesn’t require a separate power cord to lose. And at $58 on Amazon – it’s an inexpensive way to have perfect audio.

Summary
It’s unclear exactly when travel will pickup again. But it is clear that a ton of folks will be working from random destinations when it does happen. And if you follow these simple 5 steps – you can work from any hotel room and still maintain a professional video setup.
Safe travels.
And if you’re looking for more advanced lessons – see this article.
If you have any questions – please feel free to DM me on Twitter at @andytryba.